Refinishing your original hardwood floors yields a far greater return on investment than replacing them, especially in the Canadian heritage market.
- Restoration preserves irreplaceable old-growth timber, a quality modern materials cannot replicate.
- Advanced techniques can repair significant damage, including deep stains and squeaks, saving the floor’s authentic character.
Recommendation: Before considering replacement, get a detailed assessment from a craftsman specializing in heritage properties to understand the true potential and value locked in your original floors.
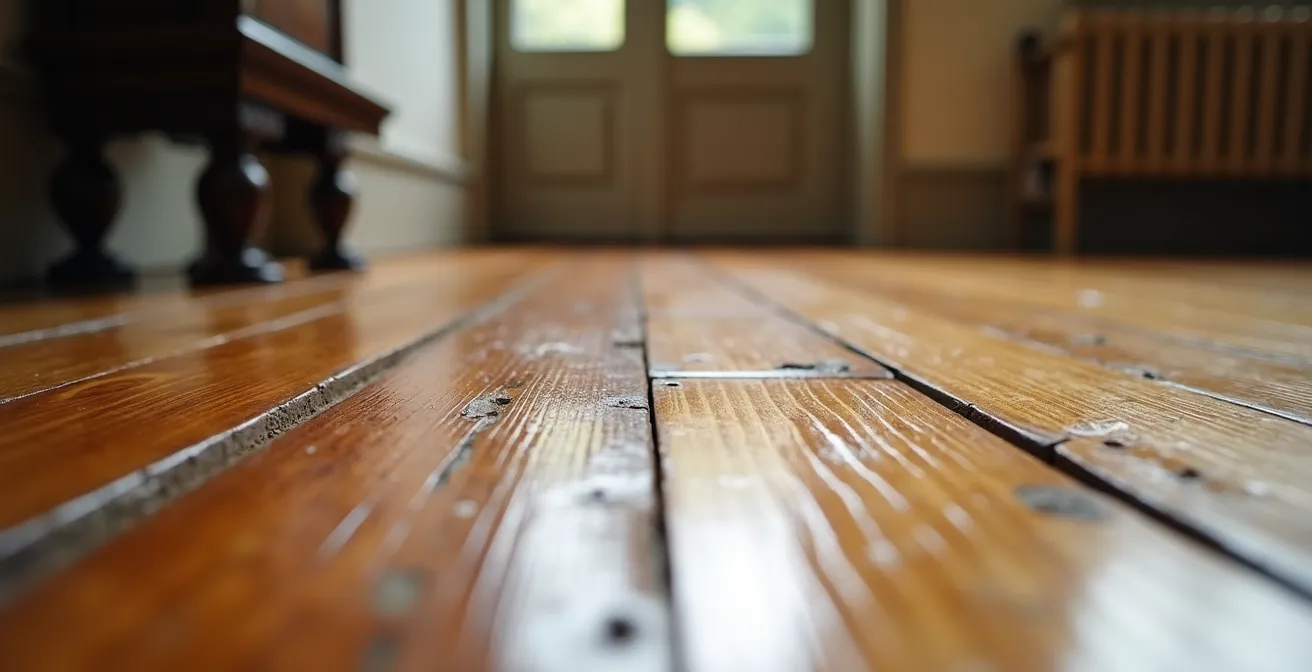
You’re standing in your duplex, looking at the scratches on that original oak floor. It’s seen decades of life, and the wear is showing. The immediate thought, pushed by a thousand renovation shows and flooring salesmen, is to rip it out. Replace it with something new, clean, and perfect. They’ll tell you it’s easier, faster, and they’ll show you samples of engineered planks or, worse, luxury vinyl that looks “just like wood.” This is the common advice, the easy path.
But that path ignores the soul of your property. Those original floors aren’t just a surface; they are a structural part of your home’s history, likely milled from dense, slow-growing old-growth Canadian forests. The material quality—the tightness of the grain, the sheer hardness—is something you simply cannot buy today. The modern flooring industry is built on speed and volume, not the patient strength of century-old timber. Replacing it is not an upgrade; it is an irreversible downgrade disguised as a cosmetic fix.
The real question isn’t whether to sand or replace. The real question is: how do you properly resurrect an irreplaceable asset? This guide is not about choosing between two equal options. It’s about understanding why restoration is almost always the superior financial and structural decision, especially for a property with character. We will look past the surface scratches to assess the true condition of your wood, explore the right techniques to bring it back to life, and demonstrate how preserving its “cachet” delivers a return on investment that new materials can’t touch.
This article provides a craftsman’s perspective on evaluating and restoring your heritage floors. The following sections will guide you through identifying your wood, understanding the risks and rewards of proper refinishing, and proving the financial case for restoration in the Canadian market.
Summary: A Craftsman’s Guide to Hardwood Floor Restoration and Value
- Maple, Birch, or Oak: How to Identify Your Floor to Choose the Right Finish?
- Drum Sander Risks: How to Avoid Gouging Your Original Floors?
- Oil vs. Water-Based Varnish: Which Finish Lasts Longer with Pets?
- Black Stains on Oak: Can You Fix Water Damage Without replacing the Board?
- How to Fix Squeaky Floors in an Old Apartment Without Opening the Ceiling?
- Flooring Transitions: How to Blend New Extensions with Original Hardwood?
- How to Furnish a 500 sq. ft. Condo to Maximize Resale Appeal
- Resale Value: Which Renovations Actually Pay Off in the Quebec Market?
Maple, Birch, or Oak: How to Identify Your Floor to Choose the Right Finish?
Before you can make any decision, you must understand the material you’re working with. It’s not just “wood.” In older Canadian homes, especially in the east, you are standing on a piece of regional history. The choice of finish, sanding technique, and repair method all depend on the species under your feet. A craftsman doesn’t use a one-size-fits-all approach; they respect the wood’s inherent properties. In Canada, heritage homes reflect local forestry, with an analysis from The Canadian Encyclopedia noting that the predominant hardwood species are birch, maple and oak in southern Ontario and Quebec.
Identifying your floor is the first step in its preservation. Don’t rely on a guess. Use a methodical approach:
- Examine the grain pattern: Red Oak, common in duplexes of that era, has a very prominent, open, and almost flame-like grain with tiny, visible pores. Sugar Maple, another Canadian staple, has a much tighter, more uniform grain with almost no visible pores. Yellow Birch falls somewhere in between, with a gentle, wavy grain.
- Check the color variation: Look in a closet or under a rug for an area with less sun exposure. Red Oak will have pinkish to reddish-brown undertones. Sugar Maple is much lighter, from creamy white to a pale brown. Yellow Birch has a characteristic golden to light brown hue.
- Test the hardness: The “fingernail test” is a simple but effective field test. Try to press your fingernail firmly into the wood in an inconspicuous spot. With dense woods like Oak and Maple (Janka hardness of 1290-1450), you’ll be hard-pressed to leave an indentation. Softer woods, like old-growth pine often found in more rustic homes, will dent more easily.
Knowing you have hard maple versus red oak isn’t trivial. Maple’s density makes it less absorbent, requiring specific staining techniques to avoid a blotchy finish. Oak’s open pores accept stain beautifully but can trap old, dark varnish if not sanded correctly. Understanding the species is the foundation of a successful restoration, ensuring the finish will protect and enhance the wood’s natural character for decades to come.
Drum Sander Risks: How to Avoid Gouging Your Original Floors?
The biggest fear homeowners have about sanding is irreversible damage, and frankly, they should. In the hands of an inexperienced operator, a drum sander is a weapon. It can gouge, create chatter marks (ripples), and remove far too much of the precious top layer of your old-growth wood. A heritage floor may only have enough thickness for two or three sandings in its entire life. A botched job can consume the floor’s entire future in a single afternoon. The goal of sanding is not to flatten the floor into submission; it is to delicately remove the old, failed finish and the very top layer of oxidized wood to reveal the fresh timber beneath.
The risk is not the tool itself, but the lack of skill. A true craftsman keeps the drum sander in constant, even motion, following the grain and feathering each pass to blend seamlessly. They know that stopping for even a fraction of a second will create a dip. However, for the most delicate heritage projects, many specialists now favour less aggressive equipment.
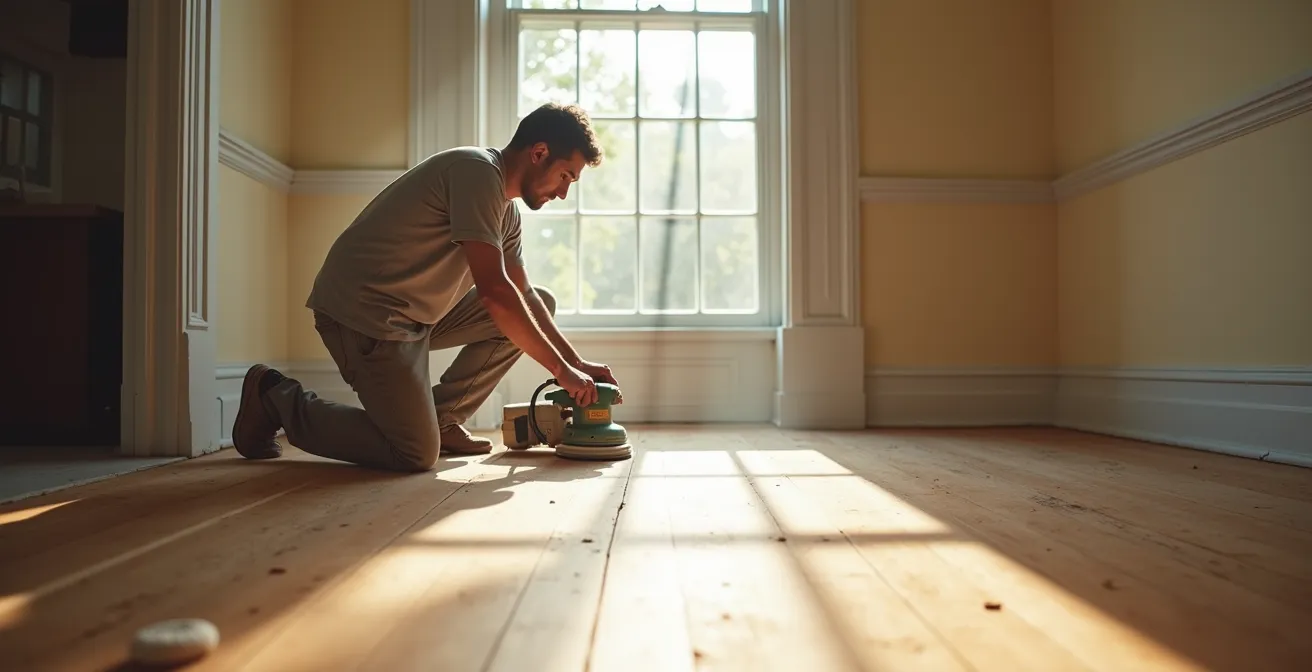
As seen above, tools like multi-disc or planetary orbital sanders offer a much higher degree of control. They remove material more slowly and evenly, making it virtually impossible to create the deep gouges a drum sander can inflict. This is especially critical on floors that may have been sanded before or have a thinner top layer. It respects the material honesty of the floor, preserving its thickness and structural integrity for future generations. This is the difference between a cheap “sand and seal” job and a professional restoration.
Your Checklist: 5 Critical Questions to Vet a Heritage Floor Specialist
- Can you provide references from heritage property projects in my city within the last 2 years?
- Are you insured specifically for work on designated heritage properties under provincial guidelines?
- Do you use dustless sanding systems appropriate for pre-1950s construction with potential lead paint concerns?
- Can you demonstrate experience with the specific wood species common to my home’s era and region?
- Will you provide a detailed written assessment of the floor’s condition, including nail placement mapping, before starting?
Oil vs. Water-Based Varnish: Which Finish Lasts Longer with Pets?
Once your floors are beautifully sanded, the choice of finish will determine their look, feel, and durability for the next decade. The modern standard is water-based polyurethane. It’s low in VOCs, dries fast, and creates a hard, clear film on top of the wood. It’s essentially a layer of plastic. For a high-traffic home with pets, this sounds ideal—a tough shell to resist scratches. However, this hardness is also its greatest weakness, especially in the Canadian climate and on old-growth wood that needs to breathe.
Old floors move. They expand and contract with the drastic humidity swings from a dry Canadian winter to a humid summer. A rigid, plastic-like water-based finish can’t flex with the wood. It can crack at the seams between boards, allowing moisture in and eventually leading to peeling or hazing. And when a deep scratch from a dog’s claw does penetrate that hard shell, you can’t spot-repair it. The entire floor must be sanded down and refinished again, costing a fortune.
Penetrating oil finishes work differently. Instead of forming a film on top, they soak into the wood fibres, becoming part of the wood itself. This nourishes the timber and provides a more flexible, forgiving finish that moves with the floor. It offers a lower-sheen, more natural look that highlights the wood’s patina and grain. While it may show superficial scratches more easily, its greatest advantage is repairability. A scratch or worn area can be lightly sanded by hand and re-oiled, blending seamlessly with the surrounding floor. For a pet owner, this means managing wear and tear over time instead of facing a catastrophic refinish.
This comparative table highlights the practical differences, particularly relevant for the dramatic temperature and humidity shifts common in Canada. The data is supported by insights from professional flooring companies who deal with these conditions daily.
| Feature | Penetrating Oil Finish | Water-Based Polyurethane |
|---|---|---|
| Flexibility in Temperature Swings | Excellent – moves with wood | Poor – can crack with expansion |
| Pet Scratch Resistance | Moderate – but easily spot-repaired | High – but requires full refinish if damaged |
| Spot Repair Cost | $50-200 per area | $3,000-5,000 full refinish |
| Canadian Winter Performance | Superior – handles humidity changes | Moderate – may show gaps |
| VOC Compliance (Canadian standards) | Low-VOC options available | Ultra-low VOC standard |
Black Stains on Oak: Can You Fix Water Damage Without replacing the Board?
Those ominous black stains, especially common on old oak floors around radiators or beneath windows, are often the reason people give up and opt for replacement. They look deep, permanent, and destructive. These stains are typically caused by a chemical reaction between water, the iron in old plumbing or nails, and the tannins naturally present in oak. It’s not just a surface discolouration; it’s a dye that has soaked into the wood fibres. Many contractors will tell you the only solution is to cut out the affected boards, a process that is costly and destroys the original, continuous flow of the floor.
However, a skilled restorer sees a chemical problem that often has a chemical solution. Before resorting to surgery, there are established techniques to reverse this staining. The key is to treat the specific type of stain with the right agent. For the common black iron stains on oak, the answer is often oxalic acid, also known as “wood bleach.” Unlike chlorine bleach, it doesn’t just strip colour; it works to reverse the specific iron-tannin reaction. The process is meticulous:
- Isolate and Apply: The oxalic acid solution is carefully applied only to the stained area.
- Patience is Key: It’s left to work, sometimes for several hours, drawing the stain out of the wood fibres.
- Neutralize and Clean: The area is then thoroughly neutralized and cleaned to stop the chemical reaction.
- Assess and Repeat: For deep stains, a poultice of wood bleach and sawdust might be applied for 24-48 hours to provide a longer, more controlled treatment.
While not every stain can be completely removed, this method can often lighten them to the point where they blend into the natural variation and patina of the old wood. Even if a few boards are too far gone, selective replacement using salvaged, period-correct lumber is a far better option than tearing out an entire room. Financially, it’s also much more sensible. An analysis of flooring costs shows that while structural repairs can cost from $2.79 to $27.87 per square foot, replacing an entire floor with new hardwood starts at the high end of that range and goes up, without even considering the loss of historical value. Saving the original board is always the first and best option.
How to Fix Squeaky Floors in an Old Apartment Without Opening the Ceiling?
A squeaky floor is more than an annoyance; it’s a sign that parts of your floor system are moving when they shouldn’t be. In an old duplex, the common culprits are floorboards rubbing against each other, boards moving against the nails that hold them, or the floorboards themselves flexing over the subfloor. The conventional, and most disruptive, fix involves opening up the ceiling of the unit below to access the subfloor from underneath to add shims or bracing. For a duplex owner, this is a nightmare of cost, dust, and tenant disruption.
Fortunately, there are several highly effective, non-invasive methods to silence squeaks from above. These techniques focus on stabilizing the floorboards without requiring demolition. The first step is to locate the exact source of the squeak. Have someone walk on the area while you listen closely to pinpoint the movement. Once identified, a restorer has several options:
- Injecting Elastomeric Adhesive: A specialized adhesive is injected into the gaps between the squeaking board and its neighbours, as well as between the floorboard and the subfloor. As it cures, it forms a flexible bond that cushions the movement and silences the squeak.
- Using Counter-Snap Screws: This ingenious system uses a scored screw that is driven through the floorboard into the subfloor or a joist below. The fixture holds the screw at the correct depth, and once it’s set, you snap the head off just below the wood surface. The remaining hole is then filled with matching wood putty, making the repair nearly invisible.
- Applying Powdered Graphite or Talcum Powder: For minor squeaks caused by boards rubbing together, forcing a dry lubricant like graphite powder into the seams can be a simple, effective, and surprisingly durable fix.
Case Study: Non-Invasive Repair in Toronto Heritage Condos
N-Hance Toronto Midtown, a company specializing in heritage condo restoration, demonstrates the success of these methods. They frequently work within the strict rules of strata buildings, where structural alterations are forbidden. By using liquid abrasion treatments and specialized filling processes, they successfully eliminate squeaks by addressing gaps and stabilizing boards entirely from above, restoring floors in Midtown Toronto heritage buildings in 1-2 days without ever touching the subfloor.
Flooring Transitions: How to Blend New Extensions with Original Hardwood?
Sometimes, replacement is unavoidable in one specific area due to extensive damage or an extension. The common, and ugliest, solution is to install a wide, raised transition strip (a “T-molding”) that creates a visual and physical bump on the floor. It’s a loud announcement that says, “Here is where the old, good floor ends and the new, different floor begins.” It’s a jarring interruption that cheapens the look of the entire space. A craftsman would never allow this.
The proper method is to create a seamless transition through a technique called “lacing” or “weaving.” This involves surgically integrating the new floor with the old one so that the transition is virtually invisible. It is an art form that requires precision and a deep respect for the material. The process involves removing select boards from the edge of the original floor in a staggered, finger-like pattern. New boards, custom-milled to the exact, often non-standard, dimensions of the old ones, are then woven into these gaps. This creates a strong, interlocking join that avoids a hard line.
The real mastery comes in matching the appearance. This isn’t just about finding the same wood species. It’s about replicating a century of life. A restorer might use techniques like ammonia fuming for oak or a steel-wool-and-vinegar solution for pine to artificially age the new boards, replicating the deep, rich patina of the original floor. The stain and finish are then feathered across the blend zone, making the transition disappear into the natural variations of the wood.
Instead of a clumsy transition strip, you get an uninterrupted flow of beautiful hardwood. This technique celebrates the material honesty of the floor, honouring the old while respectfully integrating the new. It’s more labour-intensive, but the result is the difference between a patch job and a true restoration.
How to Furnish a 500 sq. ft. Condo to Maximize Resale Appeal
After you’ve invested in restoring your beautiful heritage floors, the last thing you want to do is hide them. In a smaller space like a 500 sq. ft. condo or duplex unit, the floor is the largest and most impactful design element. Making it the star of the room not only makes the space feel larger but also directly showcases a high-value feature to potential buyers. The wrong furniture can completely negate the appeal of a perfectly restored floor.
Avoid heavy, solid-base furniture that sits directly on the floor—think bulky sofas with skirts, solid-base coffee tables, and heavy media units. These pieces visually chop up the floor, making the room feel smaller and hiding the very asset you want to display. Instead, the strategy is to elevate everything. Choose “leggy” furniture that allows the eye (and light) to travel under it, creating an illusion of space and showcasing the continuous flow of the hardwood.
Case Study: Staging Strategy in Canadian Urban Markets
Canadian Home Style notes that staging strategies are tailored to local buyer preferences. In markets like Montreal’s Griffintown, buyers respond well to an industrial-heritage aesthetic that combines restored original floors with metal and reclaimed elements. The key, regardless of style, is using furniture that highlights the floor. Canadian brands like Gus* Modern are popular in staging because their designs often feature elevated, “leggy” pieces that create visual space and turn the heritage flooring into the room’s undeniable focal point.
By choosing furniture with slim legs—sofas, chairs, sideboards, and tables—you allow the full expanse of the restored floor to be seen. This simple principle makes the room feel brighter and more open. It tells a potential buyer that the floor is not something to be covered up, but a feature to be celebrated. This directly translates to higher perceived value and a stronger emotional connection to the space.
Key Takeaways
- Restoring original hardwood is not just about aesthetics; it’s about preserving a superior, irreplaceable building material.
- Advanced techniques can salvage floors with significant damage, making replacement an unnecessary and often financially inferior choice.
- In the Quebec market, the authentic character or “le cachet” of a heritage property is a significant driver of resale value.
Resale Value: Which Renovations Actually Pay Off in the Quebec Market?
Ultimately, the decision to sand or replace is an investment decision. And on that front, the data is overwhelmingly clear: restoring your original hardwood floors offers one of the highest returns on investment of any home renovation. While a new hardwood floor installation is a good investment, refinishing an existing one is even better. An analysis of market data shows a staggering 147% ROI for refinishing existing hardwood, compared to 118% for installing a new one. You spend less and get more value back. This is because you are not paying for new material; you are simply unlocking the value of an asset you already own.
In the Quebec market, this financial logic is amplified by a cultural one. The value placed on authenticity is immense. As one industry report notes:
Buyers in cities like Montreal and Quebec City place an unquantifiable but significant value premium on authentic, well-preserved historic details (‘le cachet’), especially original ‘lattes de bois franc’.
– Industry Analysis, Canadian Home Style Market Report
This “cachet” is something new materials can’t replicate. It’s the subtle patina, the tight grain of old-growth wood, and the feeling of solidity underfoot. Ripping out an original floor in a Plateau triplex is not just removing a surface; it’s erasing a key part of the property’s story and its appeal to a discerning market. The investment focus changes depending on the property type, but the principle of preserving authenticity remains a constant driver of value.
A detailed market analysis from a Quebec-based flooring company shows how the strategy shifts, but always prioritizes the existing floors. The following table, based on their data, demonstrates the smart-money approach across different Montreal property types.
| Property Type | Refinishing Cost/sqft | Value Added | ROI Focus |
|---|---|---|---|
| Plateau Triplex | $3-5 CAD | Increased rental income | Durability & low maintenance |
| Westmount House | $6-8 CAD | Property prestige | Authenticity & heritage value |
| Old Montreal Condo | $5-7 CAD | Heritage designation premium | Historical accuracy |
So when you look at those scratched oak floors, don’t see a problem to be ripped out. See a high-return asset waiting to be revealed. The most profitable, sustainable, and respectful choice is to work with what you have. Find a craftsman who understands the value of old-growth timber and has the skills to resurrect it. You will not only save the soul of your property but also make a significantly smarter financial investment.
Frequently Asked Questions about Hardwood Floor Restoration
What permissions do I need from my strata before fixing squeaky floors?
Review your strata bylaws for ‘structural alterations’ and ‘noise mitigation’ clauses. Most require written approval for any work affecting common property or structural elements.
Can the building settling be causing my floor squeaks?
Yes, building settling is common in older Canadian construction. If squeaks coincide with seasonal changes or affect multiple units, it may be a corporation responsibility under provincial condominium acts.
What are the least invasive fixes allowed in most condos?
Counter-snap screws and talcum powder between boards are typically allowed without permission. Elastomeric adhesive injection may require approval but doesn’t alter structure.