Successfully renovating a Montreal shoebox or plex isn’t about choosing new finishes; it’s about strategically negotiating with the building’s hidden structural and material history.
- The desire for an open-plan layout is dictated by “structural ghosts”—1920s load-bearing walls that require engineering, not just demolition.
- Invisible threats like vermiculite, lead paint, and old pipes are not just hazards but significant budgetary realities that must be addressed before any aesthetic work begins.
Recommendation: Before planning a layout, invest in a structural and hazardous materials assessment. Understanding what you can’t see is the key to a predictable budget and a successful project.
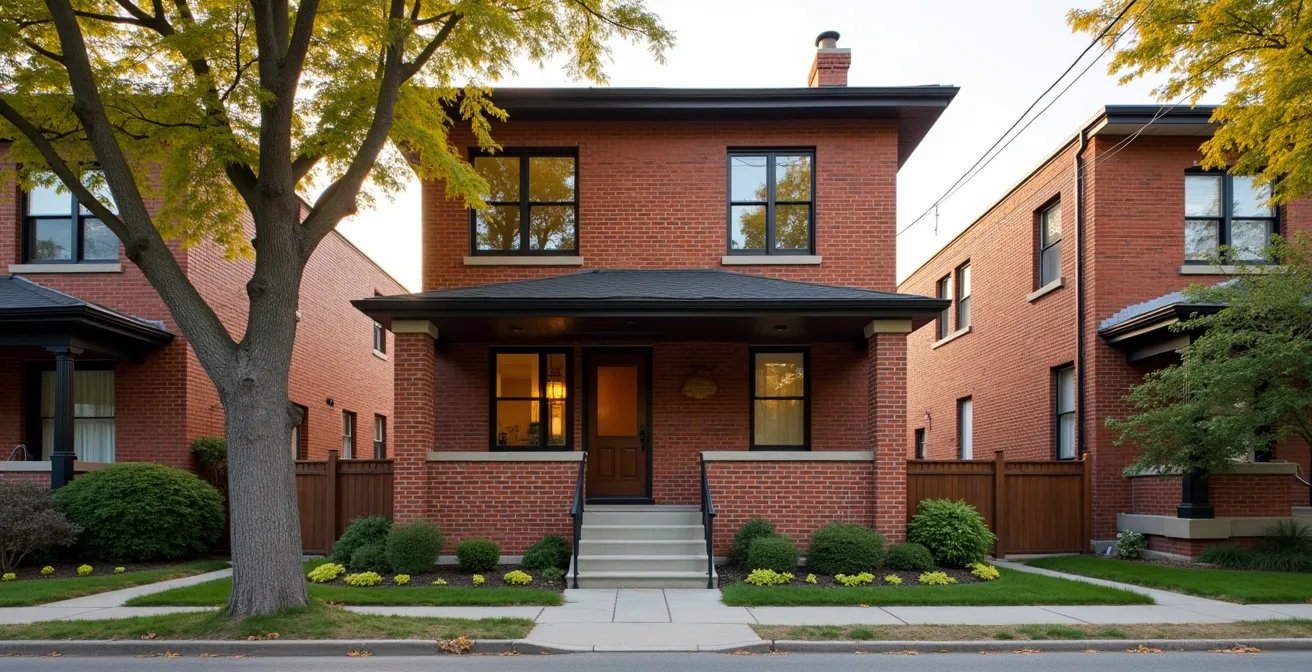
The charm of Montreal’s “shoebox” houses and early 20th-century plexes is undeniable. These compact, historic homes in neighbourhoods like Rosemont or Villeray offer a unique connection to the city’s past. For many owners, the dream is to infuse these spaces with modern functionality—an open-concept living area, a bright vertical extension, or updated services. The instinct is often to start with mood boards and design ideas, focusing on the visual transformation. Many guides will tell you to hire a good contractor and get your permits, which is sound, but incomplete, advice.
This approach, however, often leads to budget overruns and project delays. Why? Because it ignores the fundamental nature of these older buildings. The true challenge isn’t a matter of aesthetics, but of structure and materials. The key to a successful, cost-effective renovation lies not in fighting the building’s history, but in understanding it from an architect’s perspective. It’s about uncovering the “structural ghosts” in the walls and conducting “material forensics” before a single hammer swings.
This guide moves beyond surface-level advice. We will explore the engineering realities of removing walls in a 1920s structure, the protocols for handling hazardous materials, the critical decisions around aging infrastructure like plumbing, and the strategic financial analysis of building up versus moving out. We will also demystify the heritage permit process and break down the true, long-term costs of owning a piece of Quebec’s history. This is your architectural playbook for modernizing with intelligence and respect for character.
This article provides a detailed roadmap for owners of older Montreal homes, guiding you through the essential considerations for a successful renovation. The following summary outlines the key stages of this journey, from structural challenges to navigating heritage regulations.
Summary: A Strategic Guide to Modernizing Your Historic Montreal Home
- Removing Load-Bearing Walls: The Engineering Reality in 1920s Plexes
- Vermiculite and Lead Paint: How to Handle Hazardous Materials Safely?
- Lead Pipes and Cast Iron: When Must You Replace the Main Water Line?
- Vertical Addition: Is It Cheaper to Build Up or Move Out?
- Flooring Transitions: How to Blend New Extensions with Original Hardwood?
- How to Get a Renovation Permit Approved in a Heritage District Without Delays?
- Brick, Foundation, and Roof: The Big Three Costs of Plex Ownership
- Living in History: The Real Cost of Owning a Heritage Home in Quebec
Removing Load-Bearing Walls: The Engineering Reality in 1920s Plexes
The most common request we receive as architects is to create an open-concept living space. In a modern home, this is often straightforward. In a 1920s Montreal plex, however, you are dealing with what I call “structural ghosts.” These buildings were typically constructed with a central load-bearing wall that forms the spine of the house, supporting the floor joists above. Simply removing it is not an option; it’s a complex engineering problem. Any modification requires a structural engineer to calculate the loads and design a new support system, usually a combination of laminated veneer lumber (LVL) beams and support posts (columns).
The engineer’s plan is non-negotiable and must be followed precisely. This process involves installing temporary supports, demolishing the wall, installing the new beam, and transferring the load. As an example of the complexity involved, one complete renovation of a Montreal heritage home had to address not just fragile walls but also significant foundation issues and a leaning structure, requiring underpinning and major structural reinforcement. This highlights how one change can cascade into a much larger project. For perspective on a different scale, professional wall removal can be a significant investment, underscoring the need for expert planning.
The cost is not just in the beam itself but in the labour, engineering fees, and often, the related finish work—drywall, flooring patches, and electrical rerouting. Neglecting this process doesn’t just risk cosmetic cracks; it jeopardizes the structural integrity of the entire building. Understanding this reality from the outset is the difference between a controlled, planned renovation and a costly, dangerous mistake. Your dream of an open space is achievable, but it must begin with a respectful and calculated negotiation with the home’s original structure.
Vermiculite and Lead Paint: How to Handle Hazardous Materials Safely?
Once you look past the structural frame, the next step is “material forensics”—identifying the hazardous materials lurking within the walls and ceilings of your pre-1970s home. Two of the most common culprits in Canada are vermiculite insulation (which may contain asbestos) and lead-based paint. Before any demolition begins, testing for these substances is not just a recommendation; it’s a critical safety requirement for you, your family, and your construction team. Do not attempt to disturb these materials yourself.
This paragraph introduces the critical need for professional hazardous material assessment. The image below illustrates the careful, expert examination required when dealing with potentially dangerous substances like vermiculite in an older home’s attic space.

As you can see, handling these materials requires specialized knowledge and equipment. If testing confirms the presence of asbestos in vermiculite, you have two primary options: professional abatement (removal) or encapsulation (sealing it in place). Removal is the most permanent solution but also the most expensive and disruptive. Encapsulation can be a viable alternative in some situations, but it must be done correctly to be effective. Similarly, lead paint must be either professionally stripped or encapsulated with special paint, as scraping or sanding it releases toxic dust into the air.
Budgeting for this phase is crucial. Abatement costs can add thousands of dollars to a renovation project, and they are non-negotiable safety expenses. Ignoring them is not an option and can lead to serious long-term health risks and legal liabilities. Factoring in testing and potential abatement costs at the very beginning of your project planning ensures these “invisible” expenses don’t derail your budget later on.
Lead Pipes and Cast Iron: When Must You Replace the Main Water Line?
The infrastructure of an old home extends to its circulatory system: the plumbing. In many Montreal homes built before the 1970s, the main water service line entering the house is made of lead, and the drain lines (stacks) are heavy cast iron. While cast iron can last a long time, it is prone to corrosion and cracking over its 50-100 year lifespan. Lead service lines, however, pose a direct health risk and should always be a priority for replacement.
The City of Montreal has a program to replace the public portion of lead service lines (from the water main to the property line), but the homeowner is responsible for the private portion (from the property line into the house). It is highly recommended to coordinate this replacement with the city’s work to minimize cost and disruption. To help homeowners, the RénoPlex program offers substantial funding, with grants of up to $40,000 for buildings with 2-5 units, which can often be applied to major plumbing work. It’s a vital resource for plex owners.
The decision to replace plumbing is often tied to the scope of your renovation. If you are already opening up walls and floors for other reasons, it is the most cost-effective time to replace old supply lines with modern PEX or copper and upgrade cast iron drains to ABS. The following table shows how different Canadian municipalities approach the shared responsibility of lead pipe replacement.
| City | Program Name | Homeowner Responsibility | Municipal Support |
|---|---|---|---|
| Montreal | Lead Service Line Replacement | Private side replacement | Coordinates with city side replacement |
| Toronto | Priority Lead Water Service Replacement | Property line to home | Street to property line |
| Halifax | Lead Service Line Program | Private portion costs | Public portion replacement |
Waiting for a cast iron pipe to fail can cause catastrophic water damage, far exceeding the proactive cost of replacement during a planned renovation. From an architectural standpoint, addressing the home’s “veins” is as fundamental as reinforcing its “bones.”
Vertical Addition: Is It Cheaper to Build Up or Move Out?
When your shoebox home feels too small, the classic Montreal question arises: do we add a second story or move? This is not just a personal choice but a complex “cost-volume analysis.” Moving involves transaction costs (realtor fees, welcome tax), but it provides certainty on the final space and cost. A vertical addition, while allowing you to stay in your neighbourhood, is a major construction project with a budget that can be difficult to predict. The decision requires a strategic look at market conditions, renovation costs, and zoning laws.
The cost to add a second floor is substantial and goes far beyond framing and roofing. It requires a new staircase, which consumes valuable space on the ground floor. The entire existing structure, including the foundation, must be assessed by an engineer to ensure it can support the additional load. Often, this requires reinforcing the foundation, a significant and costly undertaking. Furthermore, the entire ground floor becomes a construction zone, meaning you may need to move out for several months, adding rental costs to your budget.
Case Study: The Rules of Shoebox Expansion in Montreal
When considering a vertical addition, homeowners must navigate specific municipal rules. As highlighted in a review of Montreal’s shoebox transformation regulations, any expansion must respect setback rules and not exceed the height of neighbouring buildings. While most shoeboxes are permitted to reach two stories, properties designated as having high architectural value face stricter requirements, such as mandating a 1-meter setback for the new facade from the original one. This preserves a visual trace of the original structure, engaging in a “dialogue” with the home’s heritage.
To make an informed decision, you must get detailed quotes from architects and contractors, factor in engineering fees, permit costs, and a healthy contingency fund (at least 15-20%). Compare this total projected cost and timeline against the costs and benefits of selling your current home and purchasing a larger one. Sometimes, from a purely financial standpoint, moving is the more prudent choice. However, for those deeply attached to their home and neighbourhood, a well-planned vertical addition can be a transformative investment.
Flooring Transitions: How to Blend New Extensions with Original Hardwood?
After addressing the large-scale structural and systemic issues, the challenge becomes one of refinement and integration. Nowhere is this more apparent than with flooring. Many older Montreal homes boast beautiful, original hardwood with a rich patina that is impossible to replicate. When you add an extension or reconfigure a layout, creating a seamless transition between the old and new floor is an art form—what I call an “aesthetic suture.”
The ideal solution is to source reclaimed hardwood of the same species, width, and era to “weave” into the existing floor. This involves removing some of the original boards at the threshold and interlacing the new boards, creating a flawless, continuous surface after sanding and refinishing the entire area. This method is the most elegant but also the most labour-intensive and dependent on finding matching materials. If a perfect match is unavailable, your architect can help you explore other deliberate, design-forward strategies.
One effective technique is to create a distinct border or “feature strip” using a contrasting wood species or even a different material like tile or stone. This turns the transition from a problem into an intentional design element. Another option is a simple, clean T-molding, which sits on top of the two floors and covers the gap. While this is the most straightforward and economical solution, it creates a visible and physical break. The choice depends on your budget and aesthetic goals. The worst approach is to simply install a new floor that *almost* matches the old one; the subtle differences in colour, grain, and sheen will be more jarring than a deliberate contrast.
How to Get a Renovation Permit Approved in a Heritage District Without Delays?
If your home is in a designated heritage area like Old Montreal or parts of the Plateau, the permit process is more than a formality; it’s a “heritage dialogue.” The city’s goal is to ensure that renovations respect the architectural character of the neighbourhood. Approaching this as an adversarial process is the surest way to face delays. The key to a smooth approval is preparation, clear communication, and demonstrating a thoughtful approach to preservation.
Your submission must go beyond basic construction drawings. It needs to include a heritage rationale—a clear explanation of how your proposed changes are sensitive to the building’s original character. This includes details on materials, window styles, rooflines, and brickwork. As experts at JG Contracting note in their guide to Toronto heritage renovations, this preparation is paramount. They state:
A well-prepared submission with clear drawings and heritage rationale can reduce back and forth. Rushing permits leads to redesign mid-stream.
– JG Contracting, Toronto Heritage Home Renovations Guide 2025
Working with an architect experienced in local heritage guidelines is a significant advantage. We understand what the city’s review committees are looking for and can anticipate potential issues before the application is even submitted. A pre-consultation meeting with the city’s heritage preservation staff is also a highly recommended step to get feedback on your preliminary design. This collaborative approach shows goodwill and often streamlines the formal review process, saving you months of potential delays.
Your Action Plan for a Smooth Heritage Permit Application
- Confirm Designation: First, determine if your property is officially designated or simply listed as a heritage property, as the requirements differ.
- Schedule a Pre-Consultation: Arrange a meeting with your municipality’s heritage preservation staff to discuss your project before finalizing drawings.
- Prepare Professional Drawings: Your submission must include detailed architectural plans accompanied by a clear heritage rationale explaining your design choices.
- Account for Variances: If your project requires exceptions to zoning by-laws, prepare and submit an application to the Committee of Adjustment in parallel.
- Build in Extra Time: Always factor a buffer into your project timeline for the heritage review period and potential requests for revisions from the city.
Brick, Foundation, and Roof: The Big Three Costs of Plex Ownership
While interior renovations get the most attention, the long-term viability of an older home rests on its “Big Three” exterior components: the brick facade, the foundation, and the roof. These are not one-time fixes but require ongoing maintenance and eventual replacement, representing the most significant capital costs of plex ownership. Deferring maintenance on any of them can lead to catastrophic and expensive problems, from water infiltration to structural failure.
The brickwork on a century-old home is a common point of failure. Look for spalling (flaking bricks) and crumbling mortar joints. Repointing—the process of replacing old mortar—is critical. However, it must be done correctly. As noted in a best-practices guide for heritage homes, many older Toronto houses used soft brick and lime-rich mortar. Using hard, modern Portland cement-based mortar can be disastrous, as it’s stronger than the brick itself. This traps moisture and causes the bricks to deteriorate. A proper restoration requires using a compatible, lime-based mortar mix that matches the original in composition and joint profile.
The foundation, often made of fieldstone or early concrete, must be monitored for cracks and water infiltration. A damp basement is not just a nuisance; it’s a sign of hydrostatic pressure or drainage issues that can compromise the foundation over time. In severe cases, underpinning may be required to stabilize the structure. Finally, the roof, particularly the flat roofs common on Montreal plexes, have a finite lifespan (typically 15-25 years). A proactive replacement schedule is far cheaper than repairing the extensive interior water damage that results from a leak. These three elements form the protective envelope of your home; investing in them is investing in its future.
Key Takeaways
- Modernizing a historic home is less about aesthetics and more about addressing the core structure, materials, and systems first.
- Identifying and budgeting for “invisible” issues like load-bearing walls, hazardous materials, and aging plumbing is non-negotiable for a successful project.
- Working with, not against, heritage regulations through a prepared, collaborative process is the fastest path to permit approval.
Living in History: The Real Cost of Owning a Heritage Home in Quebec
Owning a heritage home in Quebec is a commitment to stewardship. The “real cost” is a synthesis of everything we’ve discussed: the planned renovation expenses, the surprise structural repairs, the essential hazardous material abatements, and the ongoing maintenance of the “Big Three.” It is a financial and emotional investment that goes beyond a typical property. However, the government of Quebec and the City of Montreal recognize this and offer significant financial support to help owners preserve this architectural legacy.
These programs are designed to ease the financial burden of restoration and renovation. For example, for designated heritage buildings with a cultural purpose, assistance can reach up to 50% of costs, with a maximum ceiling that can be as high as $500,000 for unique buildings like former cinemas or theatres. For residential owners, there are several powerful programs available, as detailed in the table below.
| Program | Eligible Properties | Maximum Funding | Coverage |
|---|---|---|---|
| Support Program for Heritage Buildings | Designated heritage properties | Variable | Restoration and renovation |
| RénoPlex | 1-5 unit buildings | $20,000-$40,000 | General renovations |
| RénoClimat | All residential | Variable | Energy efficiency |
These grants can make a transformative difference, turning an overwhelming project into a manageable one. The key is to research these programs early in your planning process, as their application requirements can influence your project’s scope and design. Living in history is a responsibility, but with a strategic approach and by leveraging available support, it can also be a deeply rewarding and financially intelligent endeavour. The final home is not just a modernized space, but a thoughtful dialogue between past and present.
To translate these insights into a viable plan for your property, the next step is a detailed architectural assessment. This professional evaluation will provide you with a clear roadmap, an accurate preliminary budget, and the strategic guidance needed to revitalize your home with confidence.